Install on Shoprenter
On Shoprenter you paste one line of code into your store and choose how the coupon reaches checkout: with a technical coupon (proxy mode) or through the Shoprenter API.
1. Sign up
Open the EasyCoupon admin and sign in with your email address: clicking the link you receive creates your account and your shop, with you as its owner.
2. Paste the code line
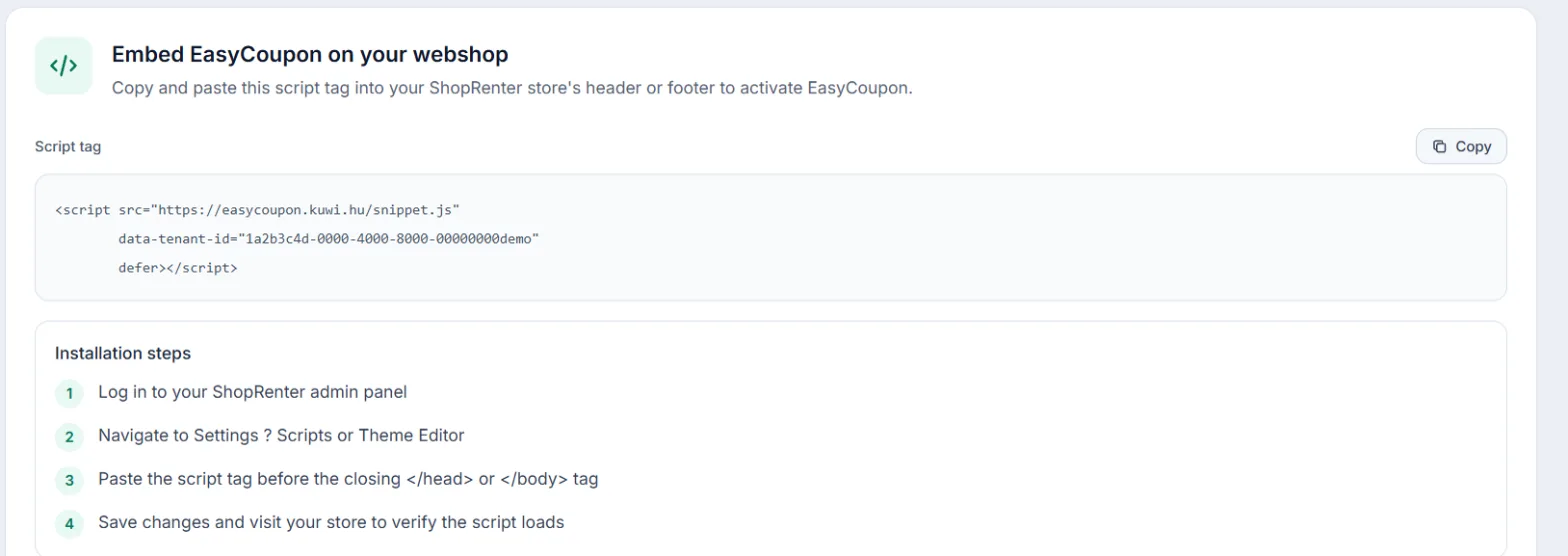
- In the admin open Billing, then its Setup tab. Your shop’s code line (script tag) is there; copy it with the Copy button.
- In your Shoprenter admin paste the code line into your store’s header or footer, before the closing
</head>or</body>tag, and save. - Browse a few pages of your store. Within a few minutes the Dashboard shows that the snippet is working and when the last event came in.
3. How coupons reach checkout
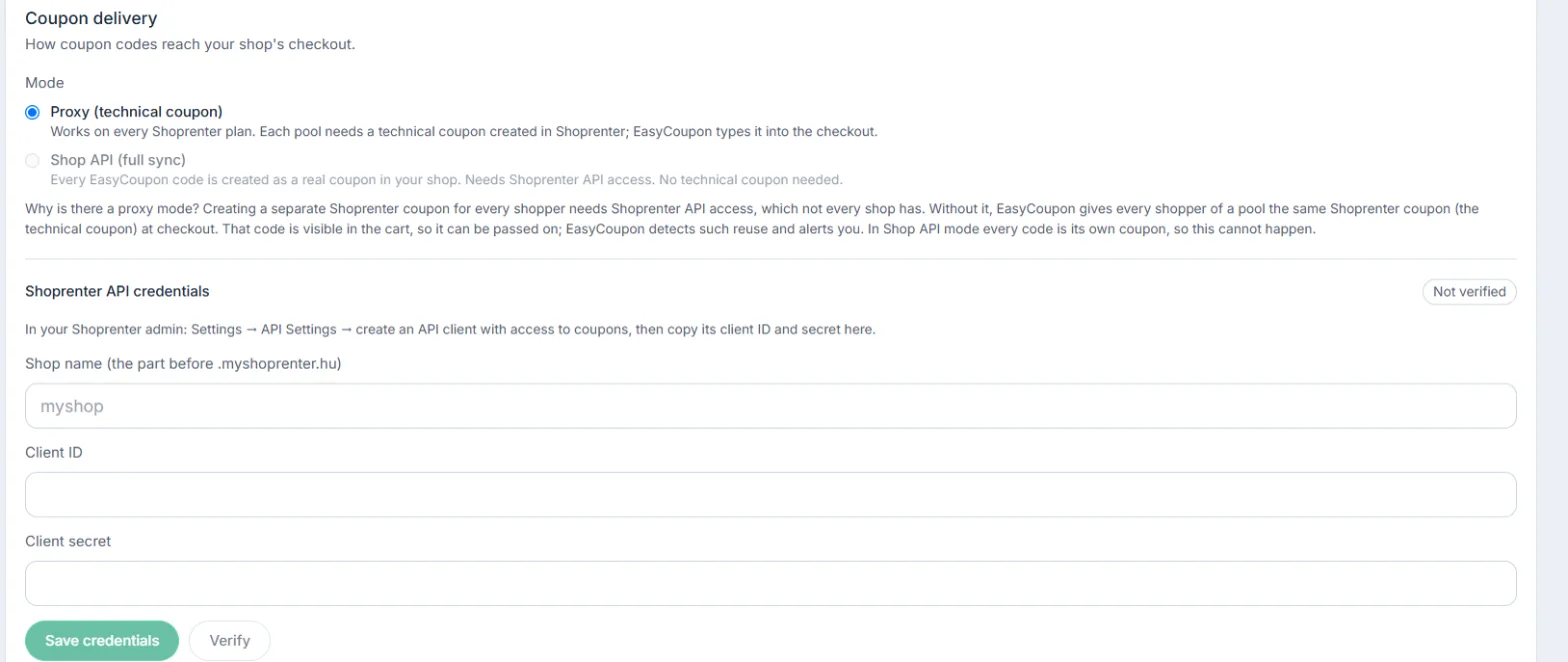
Under Settings, on the Integrations tab, in Coupon delivery, you choose:
- Proxy (technical coupon) – works with every Shoprenter plan and is the default. Every coupon pool needs a technical coupon that you create in Shoprenter with the same discount; enter its code in the pool’s Shoprenter technical coupon code (optional) field. At checkout EasyCoupon types it in for the shopper.
- Shop API (full sync) – every EasyCoupon code becomes a real Shoprenter coupon, no technical coupon needed. This needs Shoprenter API access: in Shoprenter create an API client with coupon permission, then under Shoprenter API credentials enter the Client ID and the Client secret, click Save credentials and Verify.
4. Plan
You choose a plan on the Billing page; the 30-day trial starts then, and payment goes through Stripe.